Geometry
concreteproperties uses the pre-processor from sectionproperties to build reinforced
concrete cross-sections as CompoundGeometry
objects. concreteproperties expects a
CompoundGeometry object to contain geometry
information describing both the concrete and reinforcement components of the
cross-section. The concrete portion of the cross-section can be constructed in many
ways:
Primitive Sections (e.g. rectangles, circles etc.)
Standards Sections Library (e.g. Concrete Sections, Bridge Sections)
Next, reinforcing bars can be added to the concrete geometry using the methods in the
pre module, and are also included in geometries generated by
the Concrete Sections Library.
Alternatively, other sections (such as structural steel sections) can be combined with concrete geometry to create composite sections. This can be done using geometry creation methods similar to that of concrete, except that a different material object will be provided.
Below is a brief overview of the various methods that can be used to create
geometries to be used by concreteproperties. A more exhaustive overview can be found
in the sectionproperties documentation.
Axis Conventions
Concrete cross-sections in concreteproperties are constructed in the
x-y plane. A key feature of concreteproperties is that the analyses are not
restricted to bending about the x or y axis. All analysis types (where relevant)
give the user the option of performing the analysis about a rotated u-v axis,
defined by the angle \(\theta\) (in radians).

Results in concreteproperties are labelled with consistent references to the axes.
Below are a few examples:
m_xandm_yrelate to bending moments about thexandyaxes respectively.m_xyrelates to a resultant bending moment, i.e. the positive square root of the sum of the squares ofm_xandm_y.ixx_gandiyy_grelate to the second moments of area about the globalxandyaxes respectively. The global axis refers to an axis centred at the origin (0, 0).ixx_candiyy_crelate to the second moments of area about the centroidalxandyaxes respectively. The centroidal axis refers to an axis centred at the elastic centroid (cx,cy).i11andi22relate to the second moments of area about the principal centroidal11and22axes respectively. The principal centroidal axis refers to an axis centred at the elastic centroid (cx,cy), rotated by the principal bending anglephi.iuurelates to the second moment of area about the rotated localuaxis, defined by the angletheta.
Primitive Sections
The primitive sections library contains basic shapes describing common concrete cross-sections, and can also be used as building blocks for more complex geometries.
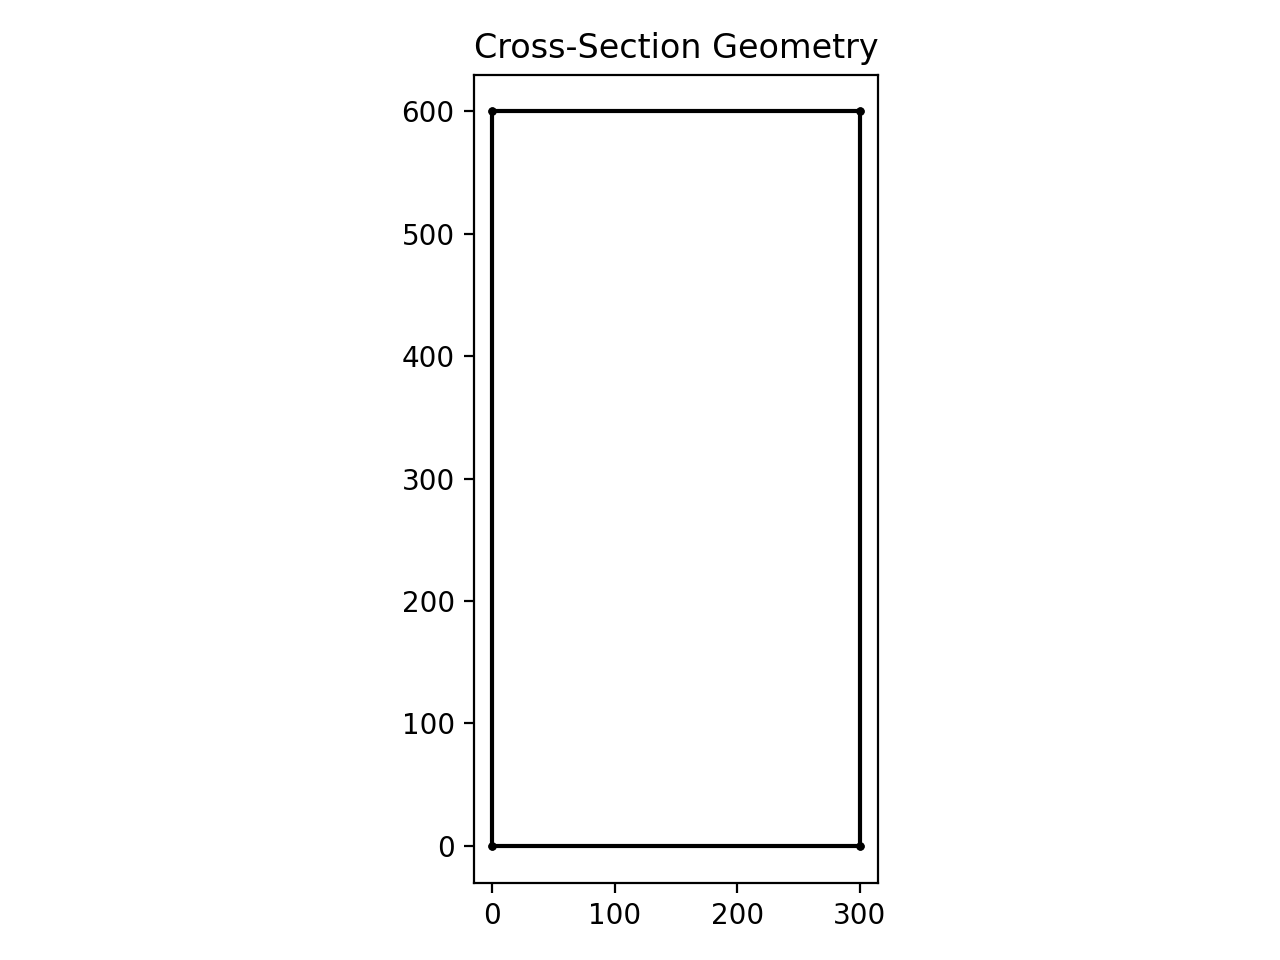
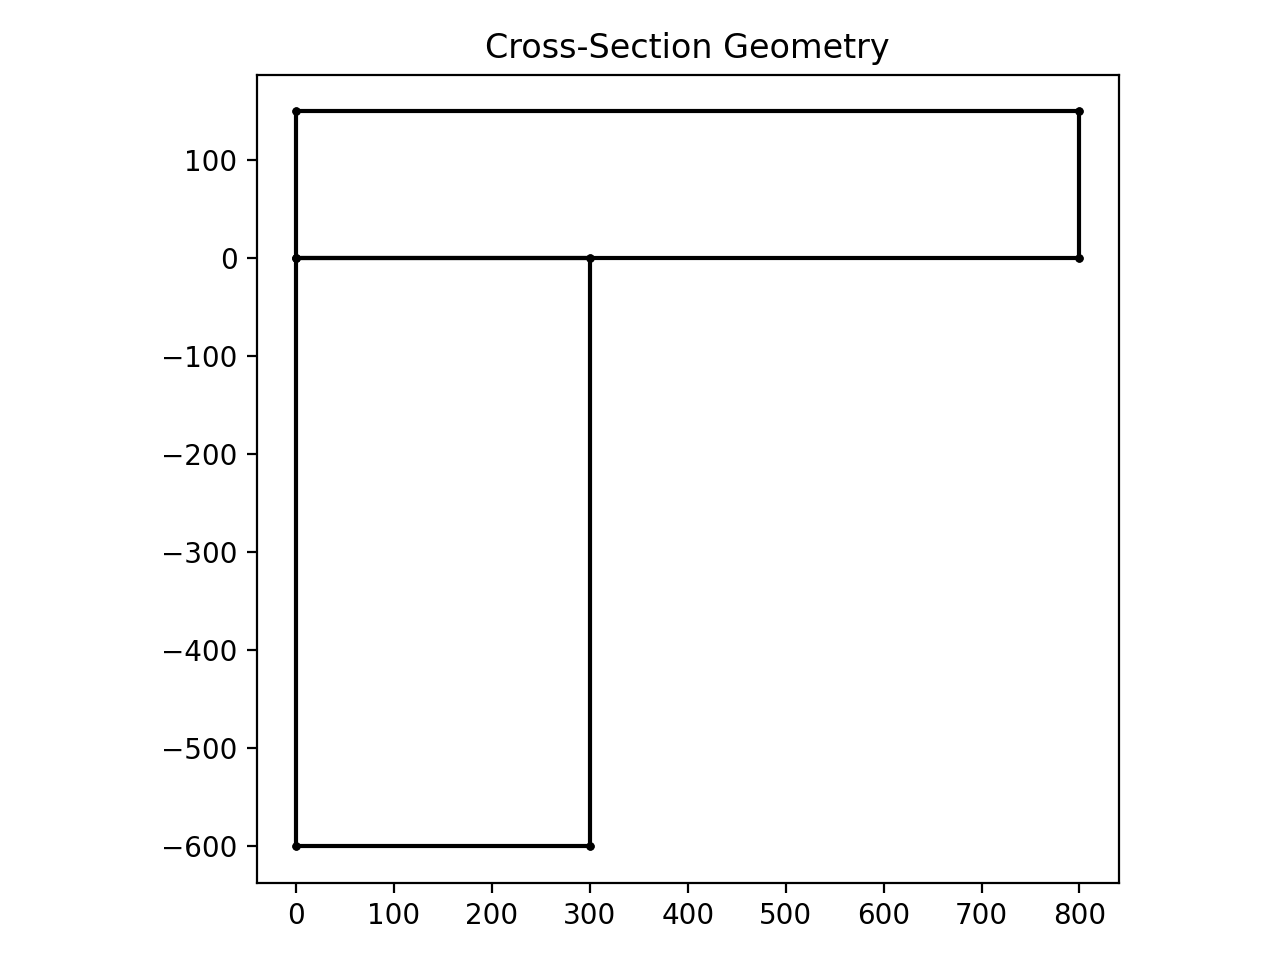
The following code creates a rectangular concrete cross-section 600 mm deep and 300 mm wide:
from sectionproperties.pre.library import rectangular_section

concrete = None  # define your concrete material properties here
geom = rectangular_section(d=600, b=300, material=concrete)
geom.plot_geometry(labels=[], cp=False, legend=False)
(Source code, png, hires.png, pdf)

600 mm deep x 300 mm wide concrete beam
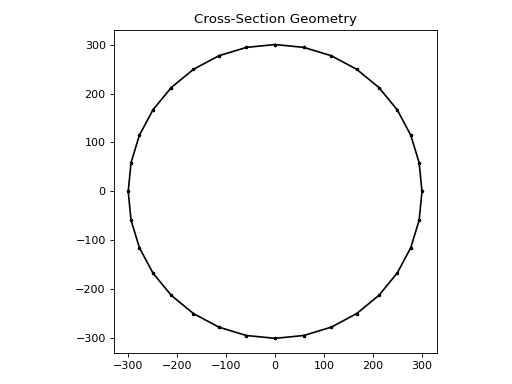
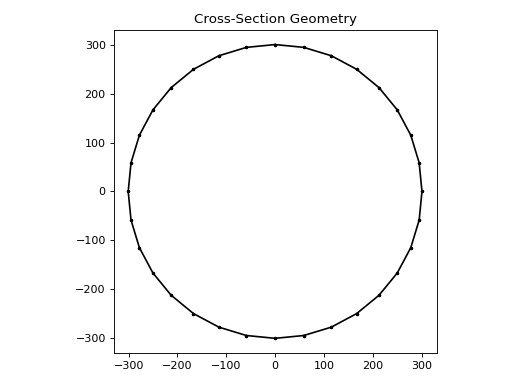
The following code creates a circular concrete cross-section with a diameter of 600 mm.
As concreteproperties constructs a mesh of triangular elements to calculate section
properties, circles must be discretised into a finite number of discrete edges. The
below example uses 32 points to discretise the circle:
from sectionproperties.pre.library import circular_section

concrete = None  # define your concrete material properties here
geom = circular_section(d=600, n=32, material=concrete)
geom.plot_geometry(labels=[], cp=False, legend=False)
(Source code, png, hires.png, pdf)

600 mm diameter concrete cross-section
By discretising the above circle, the cross-sectional area is slightly lower than a true circle:
import math
from sectionproperties.pre.library import circular_section

geom = circular_section(d=600, n=32)

print(f"{geom.calculate_area():.2f}")
>>> 280930.06

print(f"{math.pi * 600 * 600 / 4:.2f}")
>>> 282743.34
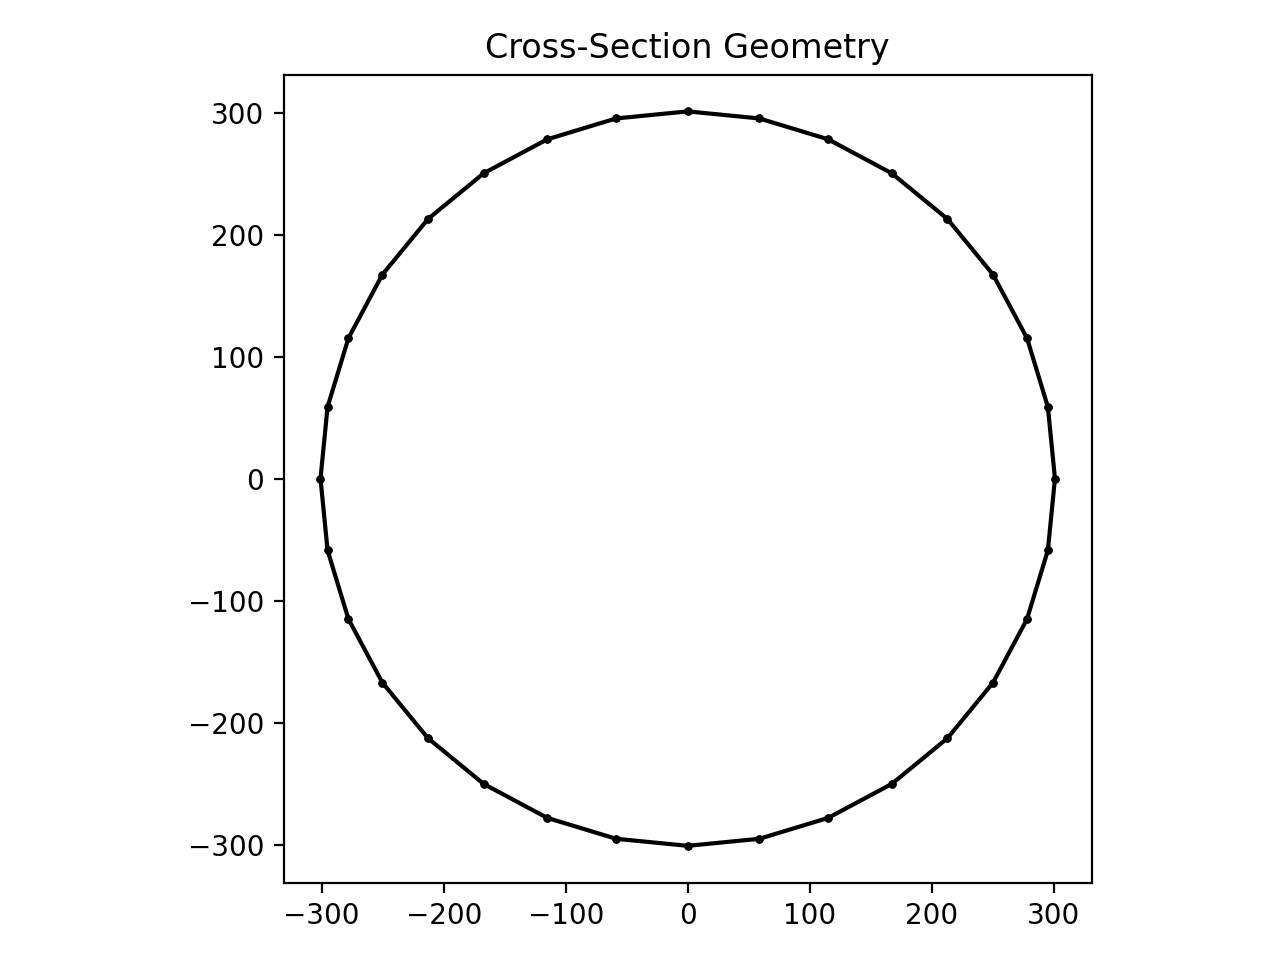
This discretisation error can be avoided by using the
circular_section_by_area()
function, which adjusts the diameter based on the number of discrete points to ensure
a circle with the correct area is generated:
import math
from sectionproperties.pre.library import circular_section_by_area

concrete = None  # define your concrete material properties here
geom = circular_section_by_area(area=math.pi * 600**2 / 4, n=32, material=concrete)
geom.plot_geometry(labels=[], cp=False, legend=False)
(Source code, png, hires.png, pdf)
600 mm diameter concrete cross-section
import math
from sectionproperties.pre.library import circular_section_by_area

geom = circular_section_by_area(area=math.pi * 600**2 / 4, n=32)

print(f"{geom.calculate_area():.2f}")
>>> 282743.34

print(f"{math.pi * 600 * 600 / 4:.2f}")
>>> 282743.34
Standard Sections
The concrete and bridge sections library allow common reinforced concrete cross-sections to be quickly generated. The concrete section library also allows for the addition of simple reinforcing bars.
The following code generates a 1200 mm deep x 450 mm wide tee-beam with a 1500 mm wide x 200 mm deep flange. Reinforcement is added with 8N24 bars on the top and 4N32 bars on the bottom:
from sectionproperties.pre.library import concrete_tee_section

concrete = None  # define your concrete material properties here
steel = None  # define your steel material properties here
geom = concrete_tee_section(
  b=450,
  d=1200,
  b_f=1500,
  d_f=200,
  dia_top=24,
  area_top=450,
  n_top=8,
  c_top=30,
  dia_bot=32,
  area_bot=800,
  n_bot=4,
  c_bot=30,
  n_circle=12,
  conc_mat=concrete,
  steel_mat=steel
)
geom.plot_geometry(labels=[], cp=False, legend=False)
(Source code, png, hires.png, pdf)
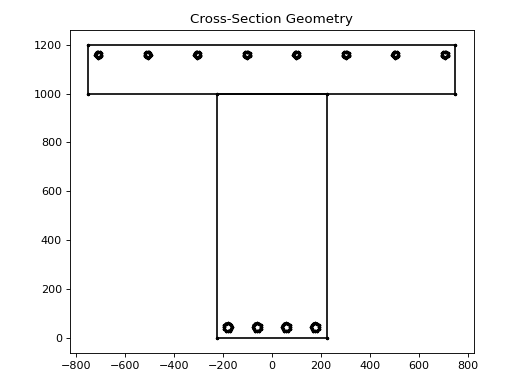
1200 mm deep concrete tee-beam
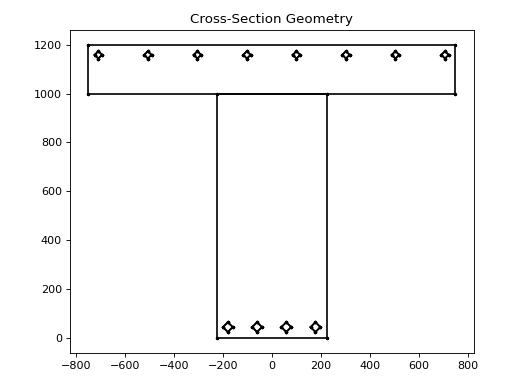
As the above code ensures that the bar areas are fixed to area_top and area_bot
respectively, a smaller value for n_circle may be used to speed up the analysis. As
the reinforcement area is now independent of n_circle a value of n_circle=4 may
be used without any loss of accuracy in the analysis results as the centroid of the bar
and area of the bar is all that concreteproperties requires:
from sectionproperties.pre.library.concrete_sections import concrete_tee_section

concrete = None  # define your concrete material properties here
steel = None  # define your steel material properties here
geom = concrete_tee_section(
  b=450,
  d=1200,
  b_f=1500,
  d_f=200,
  dia_top=24,
  area_top=450,
  n_top=8,
  c_top=30,
  dia_bot=32,
  area_bot=800,
  n_bot=4,
  c_bot=30,
  n_circle=4,
  conc_mat=concrete,
  steel_mat=steel
)
geom.plot_geometry(labels=[], cp=False, legend=False)
(Source code, png, hires.png, pdf)

1200 mm deep concrete tee-beam
The bridge sections library generates typical sections used in bridge construction, such as super tees and I-girders. Reinforcement is not automatically added for sections in this library. The following code creates a T5 Super-T section:
from sectionproperties.pre.library import super_t_girder_section

concrete = None  # define your concrete material properties here
geom = super_t_girder_section(girder_type=5, material=concrete)
geom.plot_geometry(labels=[], cp=False, legend=False)
(Source code, png, hires.png, pdf)
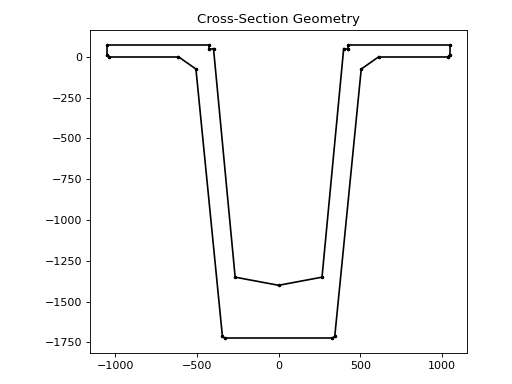
T5 Super-T section
Arbitrary List of Points
Concrete geometry can also be created from an arbitrary list of points using the
from_points() method. The following
example creates a 800 mm deep x 600 mm wide x 100 mm thick hollow box section:
from sectionproperties.pre import Geometry

concrete = None  # define your concrete material properties here

pts = [
  (0, 0), (600, 0), (600, 800), (0, 800), (100, 100), (500, 100), (500, 700),
  (100, 700)
]
fcts = [(0, 1), (1, 2), (2, 3), (3, 0), (4, 5), (5, 6), (6, 7), (7, 0)]
cps = [(50, 50)]
hls = [(400, 400)]

geom = Geometry.from_points(
  points=pts, facets=fcts, control_points=cps, holes=hls, material=concrete
)
geom.plot_geometry()
(Source code, png, hires.png, pdf)

800 mm deep hollow box section
Set Operations and Manipulation
sectionproperties geometry objects can be manipulated using python’s set operators:
|bitwiseor-bitwisediff&bitwiseand^bitwisexor+geometry addition
Further geometry manipulation can be performed with the following methods:
align_center()- aligns the centroid of the geometry with the centroid of anotherGeometryobject.align_to()- aligns an edge of the geometry with the edge of anotherGeometryobject or point.mirror_section()- mirrors the geometry about thexoryaxis.rotate_section()- rotates the geometry by a certain angle.shift_section()- translates the geometry by a certain distance in thexandydirections.split_section()- splits the geometry above and below a line.offset_perimeter()- dilates or erodes the perimeter of the geometry by a discrete amount.
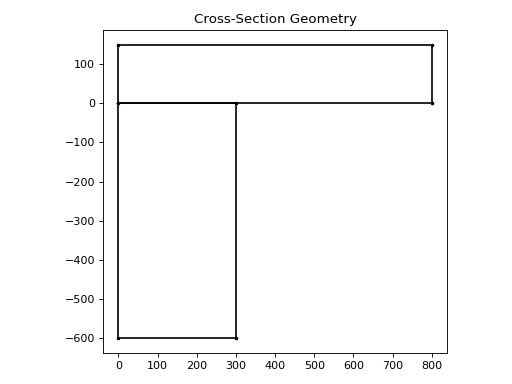
The following code creates an L-shaped beam:
from sectionproperties.pre.library import rectangular_section

concrete = None  # define your concrete material properties here
slab = rectangular_section(d=150, b=800, material=concrete)
beam = rectangular_section(
  d=600, b=300, material=concrete
).align_to(other=slab, on="bottom").align_to(other=slab, on="left", inner=True)
geom = slab + beam
geom.plot_geometry(labels=[], cp=False, legend=False)
(Source code, png, hires.png, pdf)

L-shaped beam
The following code creates the hollow section geometry example in the Arbitrary List of Points section far more succinctly:
from sectionproperties.pre.library import rectangular_section

concrete = None  # define your concrete material properties here
outer = rectangular_section(d=800, b=600, material=concrete)
inner = rectangular_section(d=600, b=400).align_center(align_to=outer)
geom = outer - inner
geom.plot_geometry()
(Source code, png, hires.png, pdf)

800 mm deep hollow box section
The following code adds a 180 mm overlay slab to a T5 Super-T section and demonstrates how different concrete material properties can be assigned to different regions of the geometry. Note how a hole is automatically generated in the closed-off region:
from sectionproperties.pre.library import rectangular_section
from sectionproperties.pre.library import super_t_girder_section

conc_precast = None  # define your concrete material properties here
conc_insitu = None  # define your concrete material properties here
beam = super_t_girder_section(girder_type=5, material=conc_precast)
slab = rectangular_section(
  d=180, b=2100, material=conc_insitu
).shift_section(-1050, 75)
geom = beam + slab
geom.plot_geometry()
(Source code, png, hires.png, pdf)
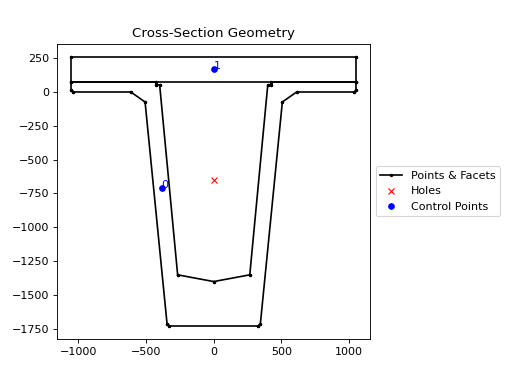
T5 Super-T section with an overlay slab
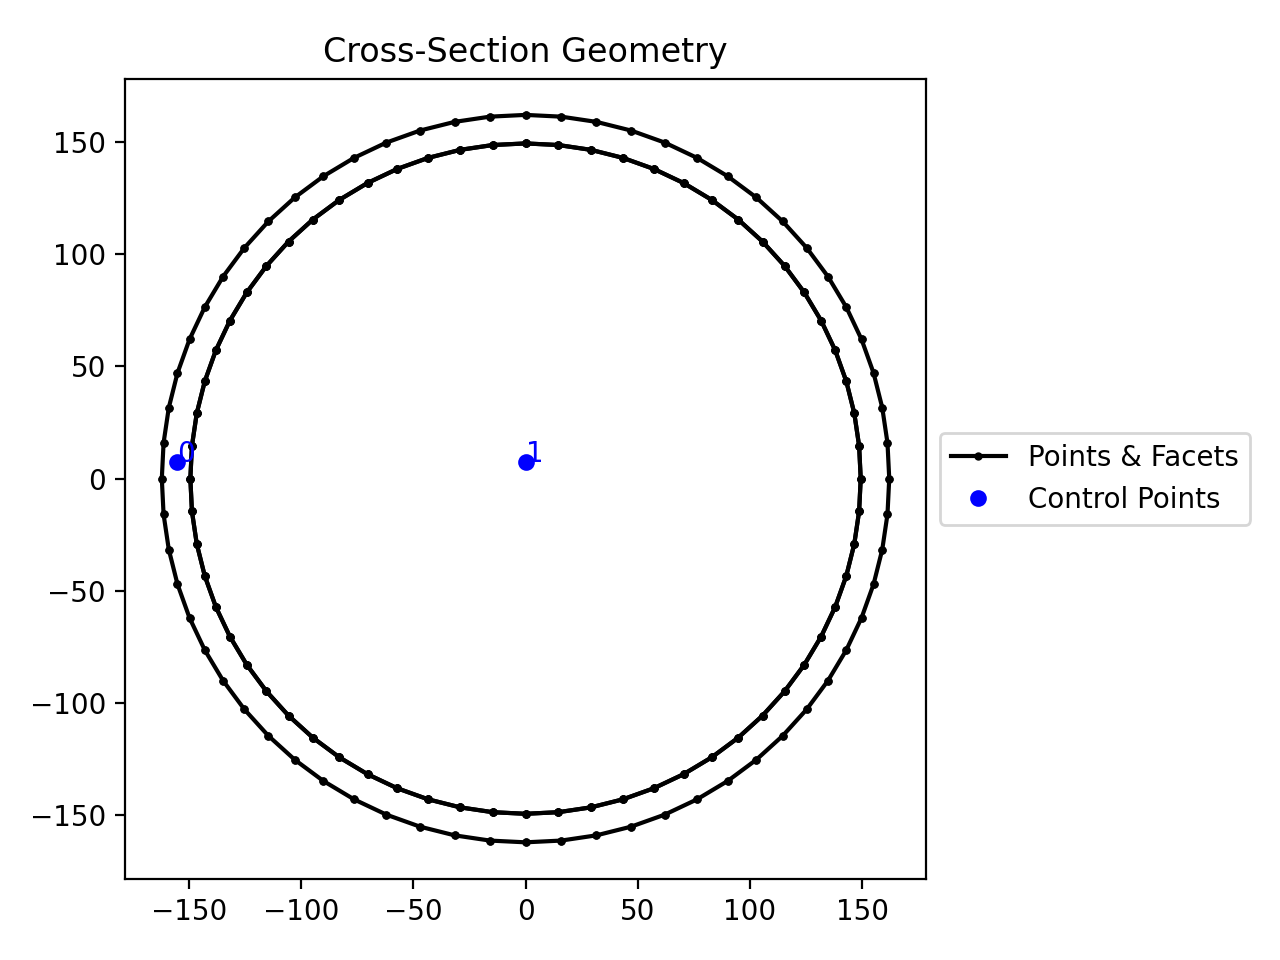
The following code creates a 323.9 mm x 12.7 mm circular hollow section filled with concrete and demonstrates how composite sections can be created:
import sectionproperties.pre.library as sp_ps

conc = None  # define your concrete material properties here
steel = None  # define your steel material properties here
steel_col = sp_ps.circular_section_by_area(
  area=np.pi * 323.9**2 / 4,
  n=64,
  material=steel,
)
inner_conc = sp_ps.circular_section_by_area(
  area=np.pi * (323.9 - 2 * 12.7) ** 2 / 4,
  n=64,
  material=conc,
)
geom = steel_col - inner_conc + inner_conc
geom.plot_geometry()
(Source code, png, hires.png, pdf)

Concrete filled circular hollow section
Adding Reinforcing Bars
Reinforcing bars can be added to any sectionproperties geometry by using the following
functions:
add_bar()- adds a single bar to the geometryadd_bar_rectangular_array()- adds a rectangular array of bars to the geometryadd_bar_circular_array()- adds a circular array of bars to the geometry
add_bar()
- concreteproperties.pre.add_bar(geometry: Geometry | CompoundGeometry, area: float, material: SteelBar | SteelStrand, x: float, y: float, n: int = 4) Geometry | CompoundGeometry[source]
Adds a reinforcing bar to a
sectionpropertiesgeometry.Bars are discretised by four points by default.
- Parameters:
geometry (Geometry | CompoundGeometry) – Reinforced concrete geometry to which the new bar will be added
area (float) – Bar cross-sectional area
material (SteelBar | SteelStrand) – Material object for the bar
x (float) – x-position of the bar
y (float) – y-position of the bar
n (int) – Number of points to discretise the bar circle. Defaults to
4.
- Returns:
Reinforced concrete geometry with added bar
- Return type:
Geometry | CompoundGeometry
The following code adds an 80 mm bar to a T5 Super-T section:
from concreteproperties import add_bar
from sectionproperties.pre.library import super_t_girder_section

concrete = None  # define your concrete material properties here
steel = None  # define your steel material properties here
beam = super_t_girder_section(girder_type=5, material=concrete)
geom = add_bar(geometry=beam, area=5000, material=steel, x=0, y=-1550)
geom.plot_geometry(labels=[], cp=False, legend=False)
(Source code, png, hires.png, pdf)
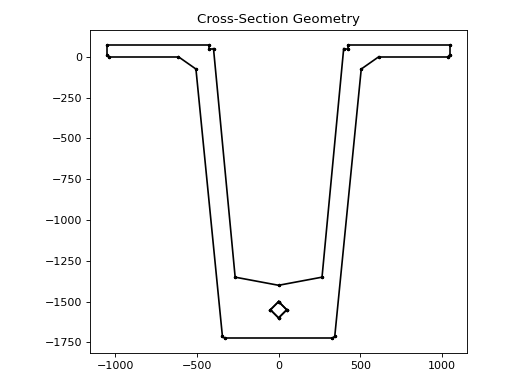
T5 Super-T with an 80 mm bar
add_bar_rectangular_array()
- concreteproperties.pre.add_bar_rectangular_array(geometry: Geometry | CompoundGeometry, area: float, material: SteelBar | SteelStrand, n_x: int, x_s: float, n_y: int = 1, y_s: float = 0, anchor: tuple[float, float] = (0, 0), exterior_only: bool = False, n: int = 4) Geometry | CompoundGeometry[source]
Adds a rectangular array of reinforcing bars to a
sectionpropertiesgeometry.Bars are discretised by four points by default.
- Parameters:
geometry (Geometry | CompoundGeometry) – Reinforced concrete geometry to which the new bar will be added
area (float) – Bar cross-sectional area
material (SteelBar | SteelStrand) – Material object for the bar
n_x (int) – Number of bars in the x-direction
x_s (float) – Spacing in the x-direction
n_y (int) – Number of bars in the y-direction. Defaults to
1.y_s (float) – Spacing in the y-direction. Defaults to
0.anchor (tuple[float, float]) – Coordinates of the bottom left hand bar in the rectangular array. Defaults to
(0, 0).exterior_only (bool) – If set to True, only returns bars on the external perimeter. Defaults to
False.n (int) – Number of points to discretise the bar circle. Defaults to
4.
- Returns:
Reinforced concrete geometry with added bar
- Return type:
Geometry | CompoundGeometry
The following code adds top and bottom reinforcement to a rectangular beam:
from concreteproperties import add_bar_rectangular_array
from sectionproperties.pre.library import rectangular_section

concrete = None  # define your concrete material properties here
steel = None  # define your steel material properties here
beam = rectangular_section(d=500, b=300, material=concrete)
geom = add_bar_rectangular_array(
  geometry=beam,
  area=310,
  material=steel,
  n_x=3,
  x_s=110,
  n_y=2,
  y_s=420,
  anchor=(40, 40),
)
geom.plot_geometry(labels=[], cp=False, legend=False)
(Source code, png, hires.png, pdf)

Rectangular beam with top and bottom reinforcement
add_bar_circular_array()
- concreteproperties.pre.add_bar_circular_array(geometry: Geometry | CompoundGeometry, area: float, material: SteelBar | SteelStrand, n_bar: int, r_array: float, theta_0: float = 0, ctr: tuple[float, float] = (0, 0), n: int = 4) Geometry | CompoundGeometry[source]
Adds a circular array of reinforcing bars to a
sectionpropertiesgeometry.Bars are discretised by four points by default.
- Parameters:
geometry (Geometry | CompoundGeometry) – Reinforced concrete geometry to which the news bar will be added
area (float) – Bar cross-sectional area
material (SteelBar | SteelStrand) – Material object for the bar
n_bar (int) – Number of bars in the array
r_array (float) – Radius of the circular array
theta_0 (float) – Initial angle (in radians) that the first bar makes with the horizontal axis in the circular array. Defaults to
0.ctr (tuple[float, float]) – Centre of the circular array. Defaults to
(0, 0).n (int) – Number of points to discretise the bar circle. Defaults to
4.
- Returns:
Reinforced concrete geometry with added bar
- Return type:
Geometry | CompoundGeometry
The following code adds a circular array of bars to a concrete column:
from concreteproperties import add_bar_circular_array
from sectionproperties.pre.library import circular_section_by_area

concrete = None  # define your concrete material properties here
steel = None  # define your steel material properties here
circle = circular_section_by_area(area=282.74e3, n=32, material=concrete)
geom = add_bar_circular_array(
  geometry=circle, area=310, material=steel, n_bar=7, r_array=250
)
geom.plot_geometry(labels=[], cp=False, legend=False)
(Source code, png, hires.png, pdf)
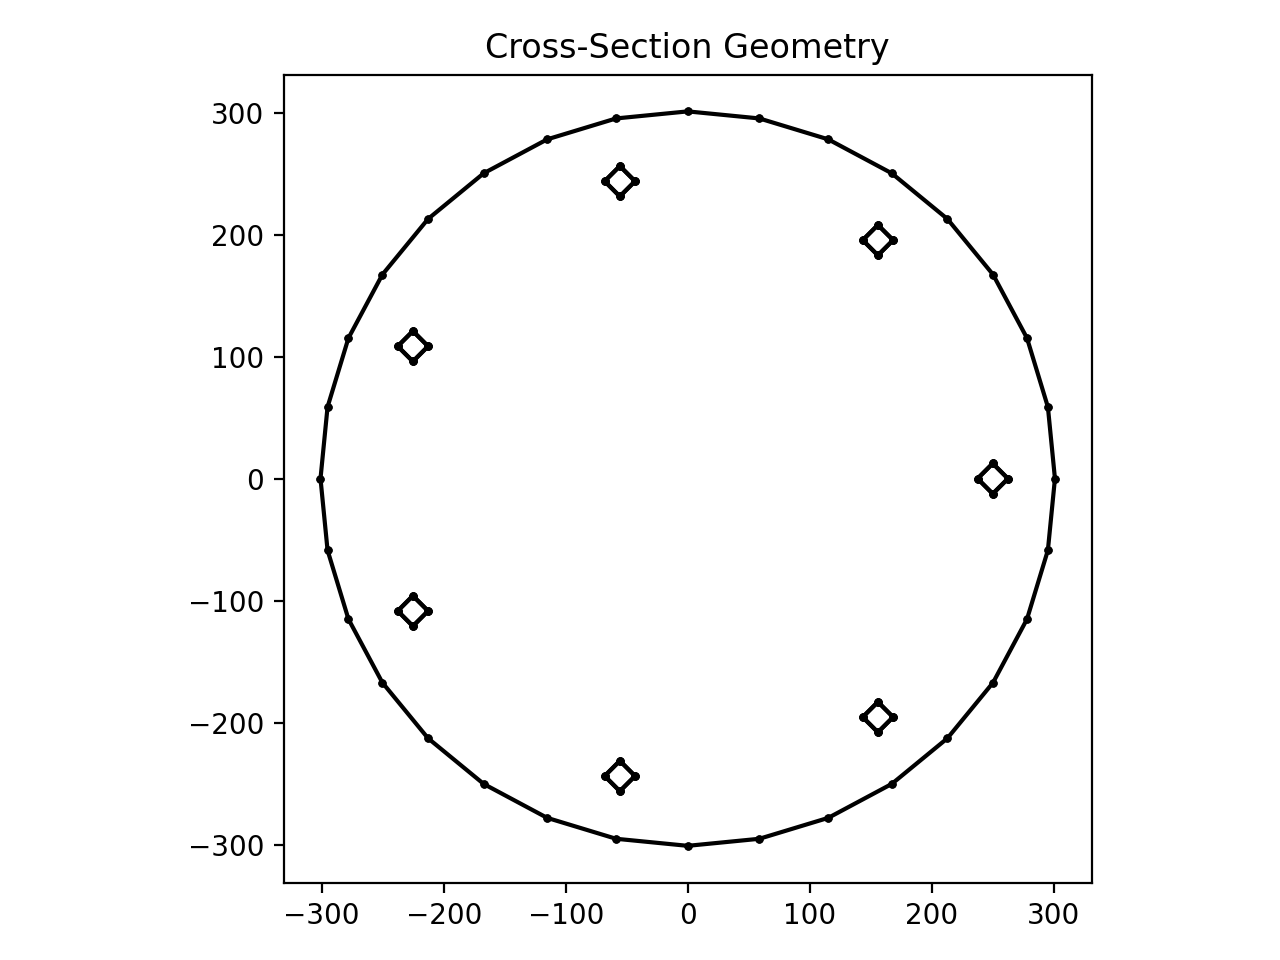

Concrete column with circular bar array
Overlapping Geometry
Care should be taken when combing multiple geometries to avoid overlapping of regions.
If this occurs, the area in these overlapping regions will be double counted and result
in erroneous results. The add bar methods in the pre module
avoid overlapping geometries by first creating a hole in the concrete at the bar
locations and only then adding the bar geometry:
geometry = (geometry - bar) + bar
Warning
A warning will be provided if overlapping geometries are supplied to
concreteproperties.